

April 30, 2026
/
Hiring a full-service pool company handles everything for you, and charges accordingly. Acting as your own general contractor means taking on the coordination role yourself: pulling the permit, hiring subcontractors, managing the schedule, and keeping the project moving from excavation to final inspection.
It’s more work. But for the right homeowner, it’s also one of the most effective ways to get a high-quality fiberglass pool installed at a fraction of what traditional full-service installers charge.
This guide walks you through exactly what that coordination process looks like — the phases, the trades, the paperwork, and the decisions — so you can determine whether the owner-builder path fits your situation, and if so, how to execute it well.
What Does a Pool General Contractor Actually Do?
A general contractor on a pool project is responsible for the whole job, not just one piece of it. They coordinate the sequence of work, hire and schedule each subcontractor, manage the permit process, handle site logistics, and serve as the primary point of contact for inspections.
On a traditional full-service pool installation, that role belongs to the pool company. When you act as your own GC, it belongs to you.
That doesn’t mean you’re swinging a shovel yourself. Most owner-builders hire licensed professionals for excavation, plumbing, electrical, and concrete. What you’re managing is the coordination: who shows up when, what needs to be completed before the next phase can begin, and how to keep the project on schedule and on budget.
If you’re new to the concept, our guide to owner-builder pools covers the model in detail — including how it differs from a traditional installation purchase.
Is Acting as Your Own Pool GC the Right Move?
Owner-builder pool projects aren’t the right fit for everyone. They’re a strong fit for homeowners who are organized, comfortable managing contractors, and willing to invest time in planning and coordination alongside the physical installation.
You’re likely a good candidate if:
- You have experience managing home improvement projects or overseeing contractors
- You’re comfortable researching local permit requirements and building codes
- You have flexibility to be present during key phases of construction
- Reducing project cost is a priority and you’re willing to trade time for savings
You may prefer a full-installation package if:
- You want to hand off the entire process to a single point of accountability
- Your schedule doesn’t allow for regular on-site availability during construction
- You don’t have experience vetting contractors or managing multi-trade projects
Still deciding which route is right for you? Our articles on whether DIY pool installation is right for you and what you can legally handle yourself on a fiberglass pool project can help you think through the decision before committing.
One thing worth knowing: acting as your own GC doesn’t mean going it entirely alone. Pool Brokers USA provides owner-builders with engineering specs, installation documentation, delivery coordination, and direct access to our team throughout the project — the kind of structured support that makes the coordination role manageable, even for first-timers.
The Step-by-Step Coordination Process
Successfully acting as your own pool GC means understanding the phases of a fiberglass pool installation in sequence. Skipping steps or starting phases out of order is one of the most common causes of costly delays and failed inspections.
Here’s the typical project flow, including a phased timeline you can use as a working reference:
| Phase | Work Completed | Typical Timing |
| Phase 1 | Planning, Design & Permits | Weeks 1–4+ |
| Phase 2 | Site Prep & Utility Marking | Week of excavation |
| Phase 3 | Excavation | Day 1–2 |
| Phase 4 | Shell Delivery & Set | Day 3 |
| Phase 5 | Plumbing, Electrical & Equipment | Days 4–7 |
| Phase 6 | Pre-Backfill Inspection | Day 8 |
| Phase 7 | Backfill | Days 9–10 |
| Phase 8 | Decking, Coping & Fencing | Days 11–18 |
| Phase 9 | Final Inspection, Fill & Startup | Days 19–21+ |
Note: Timing estimates above reflect active construction phases after permit approval. Planning and permitting timelines vary significantly by jurisdiction and are not reflected in the day counts above.
Phase 1: Planning, Design, and Permits
Before any earth moves, you need a permit. In most jurisdictions, a residential pool permit requires a site plan showing the pool’s location relative to property lines, utility easements, and existing structures. Depending on your county, you may also need engineered drawings, soil reports, or HOA approval before a permit is issued.
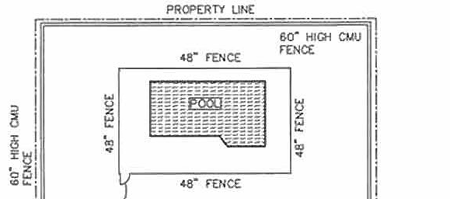
Contact your local building department early. Permit timelines vary from a few days to several weeks, and some jurisdictions are significantly backlogged. Waiting until you’re ready to dig to start the permit process is one of the most common owner-builder delays.
Permit requirements vary significantly by state and county. If you’re located in one of our service states, our state-specific permit guides for Virginia, Georgia, North Carolina, Kentucky, Florida, Louisiana, Alabama, and South Carolina walk through jurisdiction-specific requirements and links to county resources. For all permitting resources from Pool Brokers USA, see here.
This phase is also when you finalize your pool model, confirm your site layout, and begin collecting contractor quotes for each trade.
Phase 2: Site Preparation and Utility Marking
Before excavation begins, have all underground utilities marked. Contact your state’s 811 “Call Before You Dig” service – this is required by law in most states and prevents damage to buried gas, water, electrical, and telecommunications lines.
Also confirm that your site is physically accessible. Excavation equipment needs a clear path to the pool location, and your fiberglass shell, delivered on a flatbed, needs a viable route from the street to the installation site. Large trees, low-hanging utilities, tight gate openings, or setback constraints may require pre-construction planning to resolve.
Phase 3: Excavation
Excavation is the first physical phase of construction. A licensed excavator digs the pool hole to the dimensions specified in your installation documents. This work typically takes one to two days for a standard residential fiberglass pool.
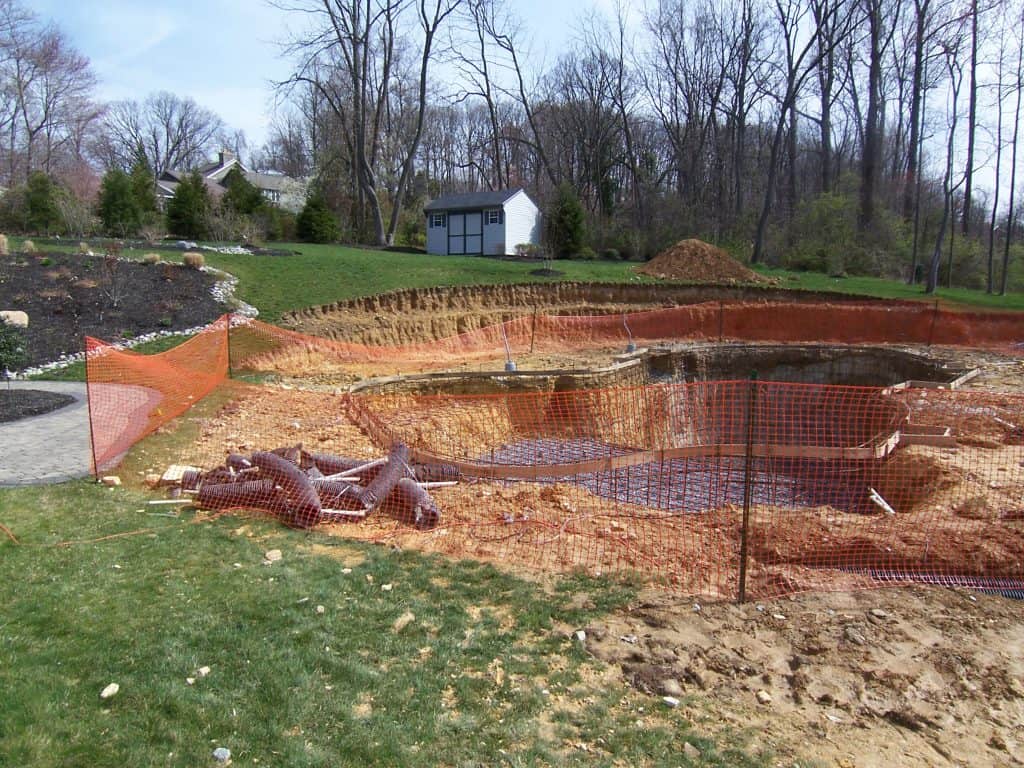
Your pool manufacturer’s installation specs are the governing document here: the excavated hole needs to match the shell dimensions closely. Oversized holes require additional fill material, add cost, and can complicate the backfill phase.
Phase 4: Shell Delivery and Set
Fiberglass pool shells are delivered on a specialized trailer and placed into the excavated hole by crane or equipment. This is a critical coordination point: excavation needs to be complete and any required pre-delivery inspections passed before your shell arrives.
Review the Pool Brokers USA ordering and delivery process so you understand delivery logistics before you schedule this phase. Confirm access routes, equipment clearance, and site readiness well in advance.

The shell is leveled and plumbing stub-outs are aligned with your equipment pad location during this phase. Many owner-builders find it valuable to have their plumber on-site during the shell set to verify stub-out alignment before anything is locked in.
Phase 5: Plumbing, Electrical, and Equipment
Once the shell is set and leveled, rough plumbing and electrical runs are completed. Your licensed plumber connects the return lines, the skimmer, and the main drain. Your electrician runs conduit and wiring to the equipment pad and installs the required bonding system.
Most jurisdictions require licensed contractors for both trades on residential pool projects. Verify licensing requirements with your local building department before work begins. Unlicensed work may fail inspection.
Phase 6: Pre-Backfill Inspection
Most jurisdictions require an inspection after rough plumbing and electrical are complete, and before backfilling begins. Do not backfill until this inspection is approved and the sign-off is documented.
Backfilling before inspection is one of the most expensive mistakes an owner-builder can make. Uncovering completed backfill to satisfy an inspector is time-consuming, costly, and entirely avoidable with proper sequencing.
Phase 7: Backfill
With inspection passed, backfill material is packed around the shell in lifts. Your installation specs will specify the appropriate fill material: typically a sand-and-gravel mix or flowable fill, depending on site soil conditions. Follow the manufacturer’s specifications closely. Improper backfill is a leading cause of structural stress on fiberglass shells.
Phase 8: Decking, Coping, and Safety Barriers
Decking, coping, and any additional features like tanning ledges or spa connections are completed during this phase. If you’re adding a spa, hot tub connection, or water feature, the spas and accessories page outlines available options and what to plan for during installation.
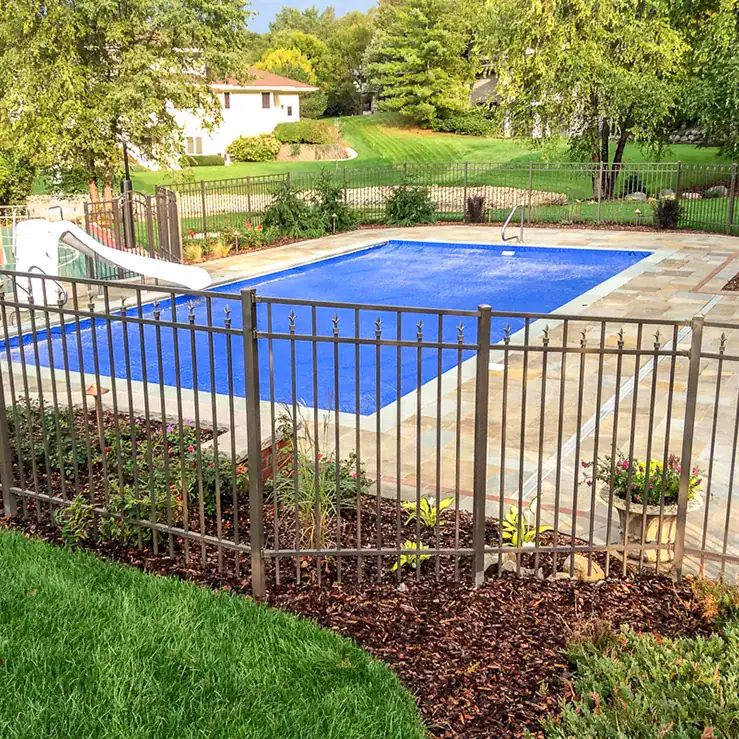
Fencing and barrier installation is required before your pool can be filled and used in most jurisdictions. Barrier requirements — including specifications for gates and hardware — are set at the state and local level and vary by jurisdiction. Always confirm exact requirements with your local building department. Do not estimate or assume requirements based on neighboring properties.
Phase 9: Final Inspection, Fill, and Startup
Once decking is complete and required safety barriers are in place, schedule your final inspection. After passing, the pool can be filled, water chemistry balanced, and equipment started up.
If you’re planning to add a heater, which extends your swim season and adds significant value, this is the phase to have it installed and commissioned. Our pool heater options are worth reviewing before startup so the installation can be scheduled in sequence.
Finding and Vetting Subcontractors
Your project is only as strong as the subcontractors you hire. For a fiberglass pool installation, you’ll typically need contractors in these categories:
- Excavation and grading
- Plumbing (licensed for residential pool work)
- Electrical (licensed for residential pool work)
- Concrete and decking
- Fencing and gate installation
Start by asking for referrals from other homeowners who have managed owner-builder projects in your area. Neighbors who have done something similar recently are often the best source of vetted subcontractors.
Verify contractor licenses through your state’s licensing board before hiring. Requirements vary, but licensed plumbers and electricians are almost universally required for pool work. Hiring unlicensed contractors in these trades can result in failed inspections, voided warranties, and — in some states — legal liability.
We recommend getting at least three written quotes per trade. Ask each contractor specifically about their experience with fiberglass pool projects. The process from concrete pool work, and a contractor unfamiliar with fiberglass installation can create problems during backfill and plumbing phases.
If coordinating subcontractors isn’t something you want to take on, Pool Brokers USA’s full-installation service handles all of this for you.
Permits, Inspections, and Paperwork
As the owner-builder, you own the permit and are responsible for scheduling inspections at each required phase. A typical fiberglass pool project involves multiple inspections: commonly at pre-excavation (in some jurisdictions), rough plumbing and electrical, pre-backfill, and final completion.
Keep a dedicated project folder (physical or digital) with copies of the following:
- Approved building permit
- All inspection sign-offs, in sequence
- Contractor licenses and certificates of insurance for each trade
- Equipment warranties and manufacturer installation documentation
- Utility marking confirmation
Missing or disorganized paperwork is one of the most common complications when owner-builders later go to sell their home, make a warranty claim, or encounter a homeowner’s insurance question. Getting organized from Phase 1 pays off later when you get into your new pool sooner.
It’s also worth noting that permit authority structures vary significantly by state. In some states, statewide building codes apply consistently across jurisdictions. In others, requirements are set entirely at the county or municipal level with no statewide standard, meaning the rules for your property may differ substantially from a neighbor two counties over. When in doubt, verify directly with your local building department.
| Pool Brokers USA supports owner-builder projects with shell delivery, installation documentation, and team access throughout your build. Whether you’re coordinating it yourself or want a full-installation package, we’ll help you find the right path. → Request a Quote |
Common Mistakes Owner-Builder Pool GCs Make
Even organized, experienced homeowners run into avoidable problems. These are the most common:
Starting Excavation Before the Permit Is Approved
Digging without an approved permit can result in stop-work orders, fines, and mandatory backfill before re-inspection. Permit timelines are not always predictable: build that uncertainty into your schedule and expectations.
Not Verifying Subcontractor Licensing
Most states require licensed contractors for plumbing and electrical on residential pools. Unlicensed work may fail inspection, void manufacturer warranties, and expose you to liability. Verify licenses before work begins, not after.
Backfilling Before Inspection Sign-Off
Backfill before your rough inspection is approved and documented. This is the single most expensive sequencing mistake on owner-builder pool projects.
Underestimating Coordination Time
Acting as your own GC is a significant time commitment during active construction. Plan for multiple site visits per week, time spent scheduling and confirming contractors, and availability for inspector visits. Treating it as a passive process while contractors self-manage typically leads to delays and miscommunications.
Assuming Barrier Requirements
Pool fencing and barrier specifications are set at the state and local level. Requirements vary by jurisdiction: what’s required in one county may be different from what’s required in a neighboring county in the same state. Always verify exact requirements with your local building department before installation. Never estimate based on what you’ve seen elsewhere.
For a full picture of where costs can accumulate across a fiberglass pool project, our guide to hidden costs of owning a fiberglass pool covers permits, site prep, and other line items that first-time buyers sometimes overlook.
Frequently Asked Questions
Do I need a contractor’s license to act as my own pool general contractor?
In most states, a homeowner can pull a residential building permit for their own property without holding a general contractor’s license. However, requirements vary by state, and some have specific owner-builder affidavit requirements that must be filed. Individual trades (particularly plumbing and electrical) almost always require licensed professionals regardless of who is acting as the GC. Verify requirements with your local building department before making assumptions.
How long does it take to install a fiberglass pool when acting as your own GC?
Active construction on a well-coordinated fiberglass pool project typically takes four to eight weeks from permit approval to final inspection, depending on contractor availability, weather, and local inspection scheduling. Planning and permitting before breaking ground can add several additional weeks. The overall timeline from purchase to swim-ready pool is commonly three to six months when all pre-construction steps are included.
What’s the difference between owner-builder and DIY pool installation?
Owner-builder means you’re managing the project as your own general contractor (hiring licensed subcontractors and coordinating the work) but not necessarily performing the physical installation yourself. DIY installation typically involves doing more of the hands-on labor personally. Most owner-builder pool projects still rely on licensed professionals for excavation, plumbing, and electrical, even when the homeowner is acting as GC.
Can I save money by acting as my own pool general contractor?
Yes. The general contractor markup on a traditional full-service pool installation typically represents a meaningful share of the total project cost. Owner-builders who manage subcontractors directly can reduce total project costs significantly compared to a full-service installation at the same quality level. The tradeoff is your time and coordination effort. Savings are most pronounced when you hire quality contractors, stay organized, and avoid common sequencing mistakes like failed inspections or rework.
What permits do I need to install a fiberglass pool?
Most residential pool installations require at minimum a building permit, which typically includes a site plan showing the pool’s location relative to property lines, utility easements, and existing structures. Depending on your jurisdiction, separate electrical and plumbing permits may also be required. Some areas require HOA approval, setback variances, or soil reports. Requirements vary significantly by state and county, always verify with your local building department before starting.
What trades do I need to hire as an owner-builder pool GC?
A typical fiberglass pool installation requires an excavation contractor, a licensed plumber, a licensed electrician, a concrete or decking contractor, and a fencing contractor. Some contractors handle multiple phases. Verify directly with each contractor.
Does Pool Brokers USA support owner-builder pool projects?
Yes. Pool Brokers USA offers both full-installation and owner-builder purchase options. Owner-builders receive the pool shell, delivery coordination, detailed installation documentation, and access to our team throughout the project. We work with homeowners who want to manage their own project as well as those who prefer to hand off the full installation.
Whether you’re ready to run your own project or still figuring out which path fits your situation, the clearest next step is the same: get the numbers in front of you.
| Ready to get started? Request a quote and let’s figure out the right path for your backyard. Full installation or owner-builder — Pool Brokers USA is built for both. → Request a Quote |
Latest Posts
The Fiberglass Pool Installation Process, Step by Step
Budgeting for a Fiberglass Pool: Every Cost Beyond the Shell
Saltwater Pools: Why Fiberglass Handles Salt Better Than Concrete
Delivery Day Checklist: How to Inspect Your Fiberglass Pool Shell
How Much Time Does Pool Maintenance Really Take?
Shipping Container Pools or Fiberglass: Which Is Better?
Fiberglass vs. Natural Swimming Pools: A Practical Cost and Maintenance Comparison
Fiberglass vs. Gunite Pools: How Construction Method Shapes Lifespan and Care
Shell Price vs. Total Project Cost: Reading a Fiberglass Pool Quote
The Fiberglass Pool Buying Guide for First-Time Buyers
Visit Our Blog
Share This Post
(opens in a new tab)
(opens in a new tab)
(opens in a new tab)