August 4, 2025
/
Installing your own fiberglass pool might seem like an ambitious weekend project, but with the right guidance, it can be the way to create your dream backyard while keeping thousands in your pocket. When you install a fiberglass pool yourself, you’re cutting costs and building something meaningful for your family. It’s work that pays off in summers together, weekend laughs, and memories that stick.
Contents
- Why Many Homeowners Opt for DIY Fiberglass Pools
- Essential Steps for Installing a Fiberglass Pool Yourself
- What DIY Pool Tasks Should I Contact Professionals About?
- Avoiding Costly Setbacks and Mistakes for Fiberglass Pool Installations
- Bringing Your Backyard Vision to Life
- Is My DIY Fiberglass Pool Installation Realistic?
Why Many Homeowners Opt for DIY Fiberglass Pools
DIY fiberglass pool installation can save you a significant amount compared to hiring a full-service installer. The price difference can be big enough that handling parts of the installation yourself can be a smart move for families looking to stay on budget. Beyond savings, the DIY approach gives you control over the timeline and creates a serious sense of accomplishment in your own backyard.
Before starting, understand that most municipalities require permits for inground pools. These regulations ensure proper setbacks from property lines and adherence to safety codes.
Essential Steps for Installing a Fiberglass Pool Yourself
Step 1: Confirm Permits and Regulations
Visit your local building department to obtain necessary permits before breaking ground. Most jurisdictions require detailed site plans showing the pool’s location relative to property lines and utilities.
Some areas also require fencing plans that meet specific safety standards to prevent accidental drownings.
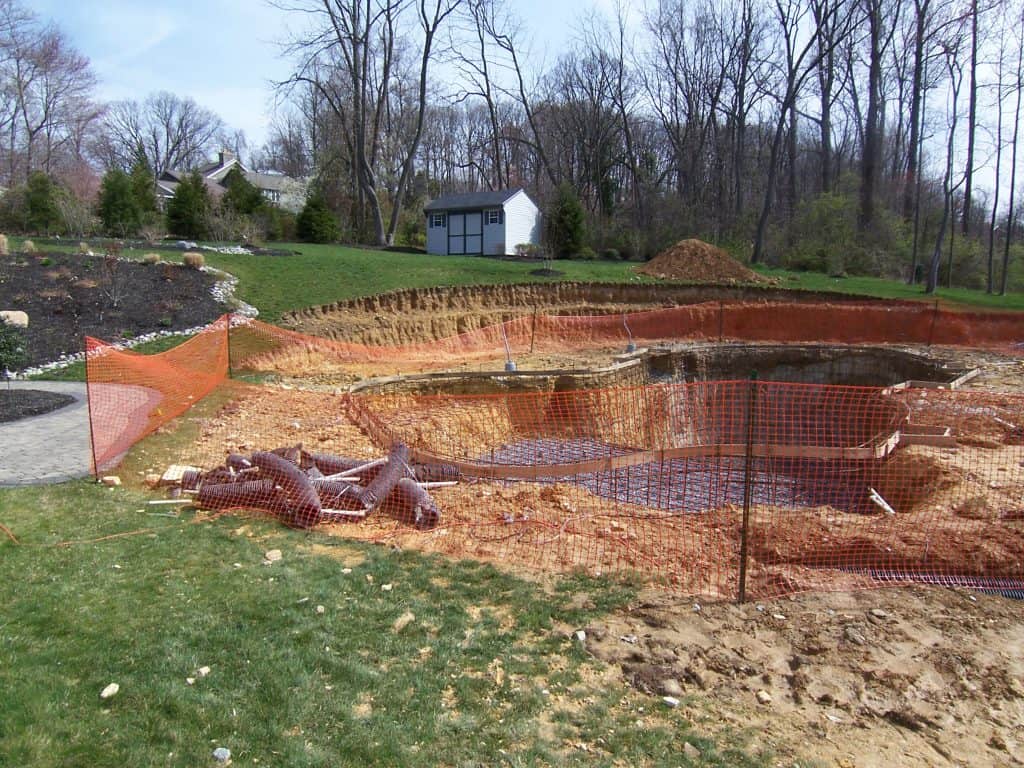
Step 2: Plan the Layout and Excavation Strategy
Mark your pool’s outline using stakes and string to visualize the finished project. This step helps identify potential issues with trees, utility lines, or drainage before excavation begins.
Test your soil conditions by digging sample holes to check for rocky terrain, clay, or high water tables that might complicate your installation.
Step 3: Prepare the Base and Place the Fiberglass Shell
Create a stable foundation using crushed stone or sand that’s perfectly level and compacted. This base prevents future settling or shifting of your pool shell.
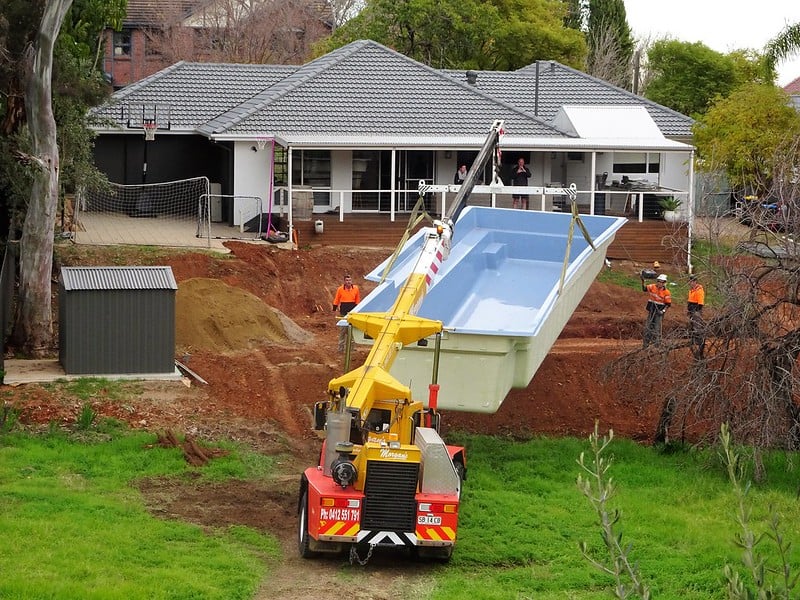
When your fiberglass shell arrives, you’ll need a crane to carefully lower it into the excavation – a process requiring precision to avoid damage.
- Proper base materials: Crushed stone works best for most soil conditions
- Level importance: Even a slight tilt can cause structural issues later
- Shell placement: Must be centered and aligned perfectly in the excavation
Step 4: Handle Basic Plumbing and Backfill
Connect the main drain, skimmer, and return lines according to manufacturer specifications. Use schedule 40 PVC pipe and ensure all connections are properly sealed and pressure tested.
Begin backfilling gradually while simultaneously filling the pool with water to maintain equal pressure on the shell walls.
Step 5: Fill the Pool and Balance the Water
Fill your pool slowly to avoid shifting the shell during this critical stabilization period. As you fill, check frequently for proper alignment and level.
Once filled, test and balance your water chemistry with appropriate products to protect both swimmers and your new pool’s surface.
What DIY Pool Tasks Should I Contact Professionals About?
Licensed Electrical Work
Electrical components for pools require specialized knowledge and certification in most states. A licensed electrician must install GFCI protection, proper bonding, and appropriate wiring for pumps and lighting.
Attempting electrical work yourself risks your family’s safety and may invalidate insurance coverage. Don’t take the risk!
Heavy Machinery and Soil Stabilization
Professional crane operators have the experience needed to place a heavy fiberglass shell without damage. For challenging yards, professionals can also install proper drainage systems that prevent future problems.
These specialized skills often require equipment beyond most homeowners’ capabilities.
- Equipment typically needed for a fiberglass pool install:
- Excavator for digging
- Crane for shell placement
- Laser level for precise grading
- Compaction equipment for backfill
Warranty and Inspection Stipulations
Many fiberglass pool manufacturers specify that certain installation steps must be performed by qualified professionals to maintain warranty coverage.
Read your warranty documentation carefully before deciding which tasks to handle yourself.
Schedule required inspections at key points in the installation process – typically after excavation, plumbing, electrical work, and final completion.
Avoiding Costly Setbacks and Mistakes for Fiberglass Pool Installations
Permit Gaps and Red Tape
Build inspection appointments into your project timeline to avoid delays. Some municipalities have backlogs that can stretch for weeks, especially during busy construction seasons.
Maintain detailed documentation of all approved plans and inspection results.
Subpar Backfill or Structural Errors
Backfill in 6-12 inch layers, compacting each layer thoroughly before adding the next.
Improper backfilling is the most common DIY mistake in fiberglass pool installation, leading to shell bulging or cracking. Use only materials specified by your pool manufacturer, typically crushed stone and clean fill. For these costly reasons, we highly recommend working with a professional pool installer so your fiberglass pool has the longest lifespan possible.
Underestimating the Budget for Unforeseen Issues
Set aside extra funds in your budget for unforeseen challenges. Hidden rocks, poor drainage, or utility line relocations can quickly increase costs.
Having this financial cushion helps you address problems properly rather than cutting corners.
- Common unexpected costs for DIY Pool Installs:
- Additional excavation for rocky soil
- Water table management
- Utility line relocation
- Extra backfill materials
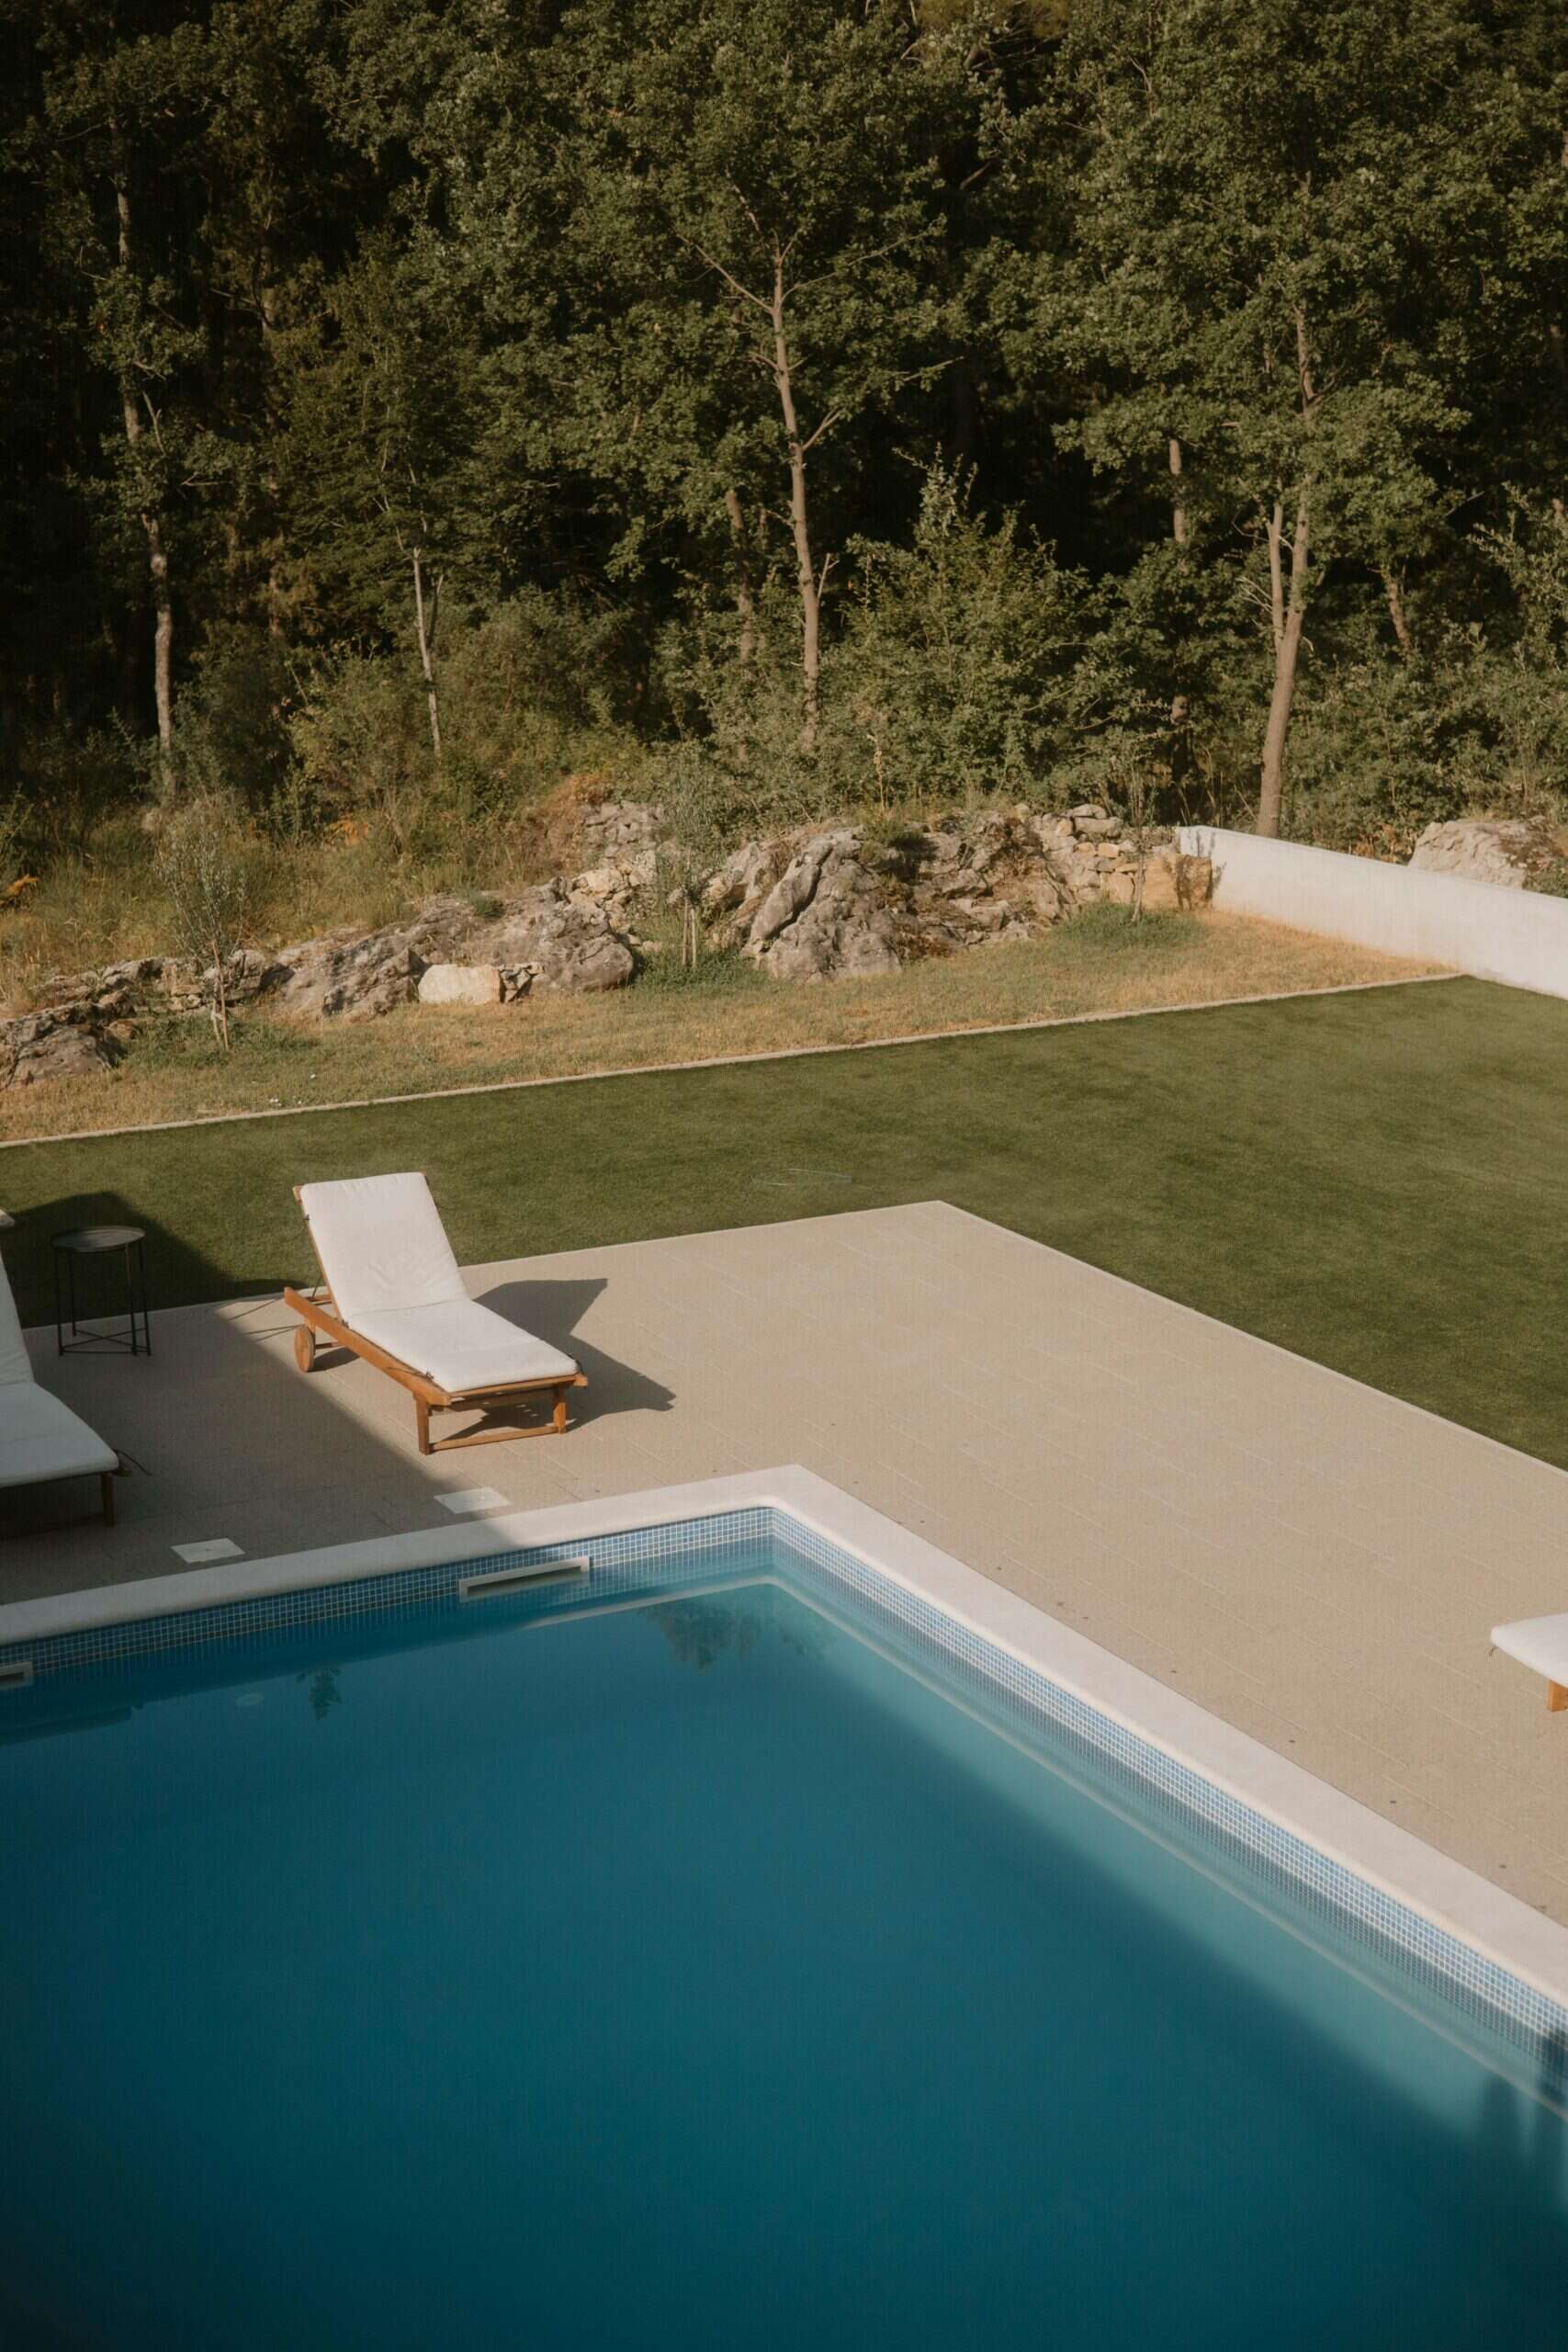
Bringing Your Backyard Vision to Life
Once your pool is installed, focus on creating a complete outdoor living space with appropriate decking, landscaping, and lighting. These finishing touches transform a simple pool into a backyard retreat for family gatherings.
Consider how your pool area will function throughout different seasons and plan accordingly with shade structures or heating options.
Is My DIY Fiberglass Pool Installation Realistic?
For many homeowners, the ideal approach is a hybrid between DIY and professional assistance. Pool Brokers USA offers high-quality fiberglass shells with detailed specifications and support materials that empower you to manage your project confidently. We also have full installation packages available to help you accomplish your dream pool build.Their flexible approach lets you handle the parts of the DIY fiberglass pool installation you’re comfortable with while getting expert guidance for the rest – giving you both savings and peace of mind.
Latest Posts
Pool Installations Across North Carolina
Pool Installations Across South Carolina
What to Consider Before Installing a Pool on a Beachfront Property
Georgia Pool Permit Requirements: Step-by-Step Guide for a Smooth Installation
North Carolina Pool Building Codes: Hurricane-Ready Fiberglass Best Practices
Kentucky Pool Permit Process: Steps & Tips to Avoid Rejection
How to Get a Swimming Pool Permit in Virginia: Fiberglass Homeowner’s Guide
What Is an Owner-Builder Pool?
Are Fiberglass Pools Good in Cold Climates?
Tips for Reopening Your Pool After Winter
Visit Our Blog
Share This Post